


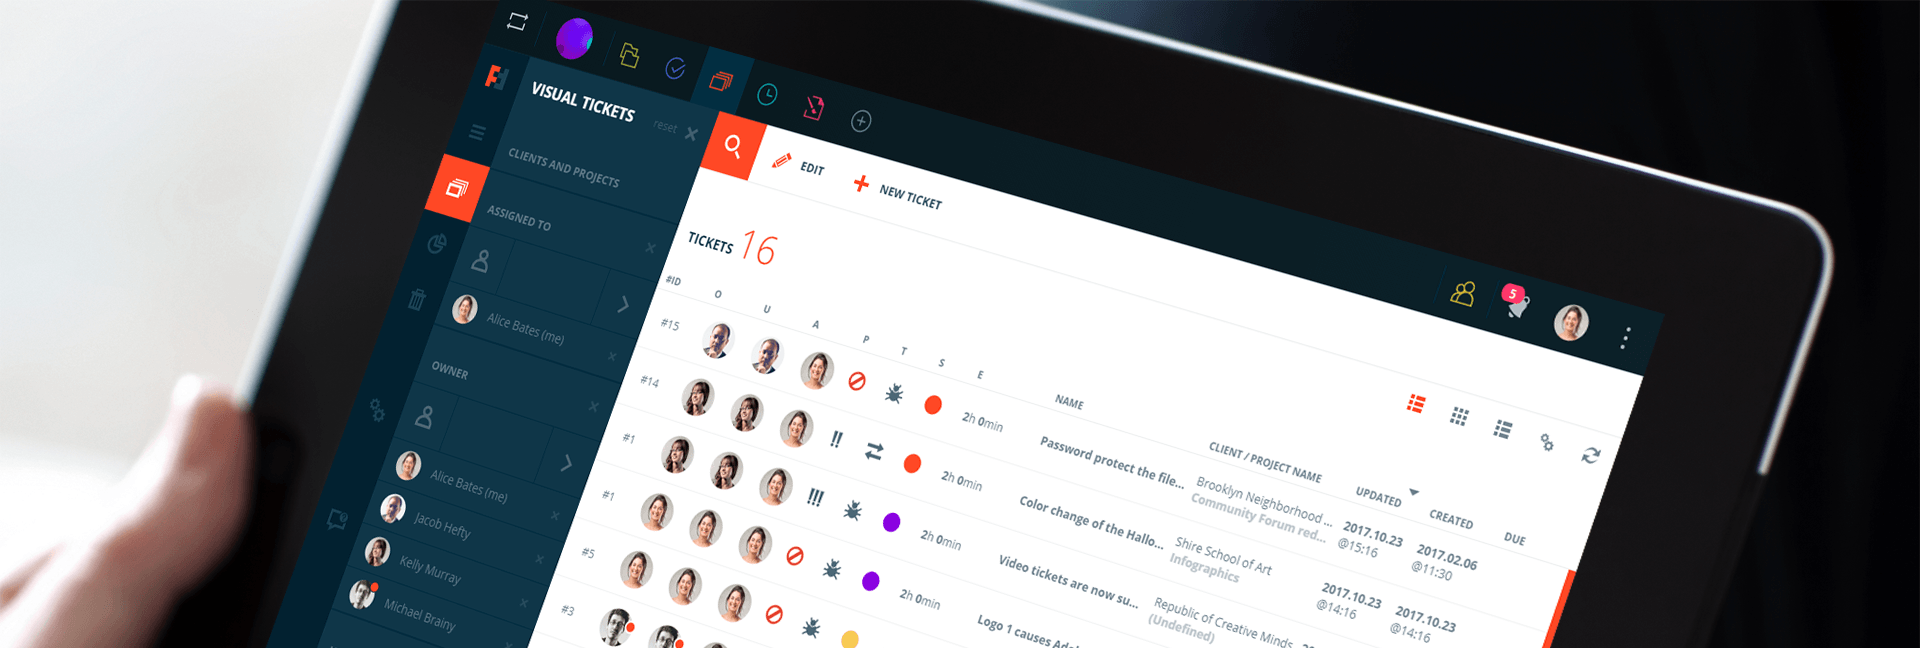
Futuramo Visual Tickets brings different teams to work together in an easy way. You can use the app for bug tracking and issue reporting, for feedback sharing, change requesting and ideas exchange.
Watch the 1-minute tutorial, meet the app and get to know how you can use it.
Features to use and love:
- Annotation tool — highlight details and comment directly on images. Make your comments short and to the point.
- Easy ticket assigning — share tickets with your colleagues.
- File sharing — attach PDF, DOC, JPG files when you need to share more information or guidelines.
- Ticket properties panel — define ticket attributes to send a quick message: what must be done, when and by whom.
- Activity log — follow latest updates, comments, and changes made to your tickets.
Short guide to creating your first ticket
Follow these steps:
- Go to Futuramo Visual Tickets.
- Click on the +NEW TICKET button on the Toolbar.
- Name your ticket (make it clear and informative).
- Upload an image or a screenshot (drag & drop, CTRL+V, add from the desktop).
- Click the EDIT IMAGE button (above the uploaded image).
- Use the annotation tool to crop the image, draw on it, add visual elements, and write comments.
- Click
 to save your edits.
 - On the Ticket Properties Panel select ticket attributes. You can assign the ticket to a Client and Project and then assign it to a colleague who will be responsible for fixing it. You can also define status, priority, type, estimated time, and due date.
- Click SAVE or SAVE & CLOSE and your ticket will be saved and sent.
Analyze your team’s performance
See the statistics of all the created tickets to better understand your team’s performance. Such insights may help you with better task management and work planning. Notice strengths and weaknesses of your team and single team members. All these takeaways will influence your future projects.
- Go to the STATISTICS section on the Main Menu (on the left side).
- Decide how your data will be presented. You can choose Doughnut Chart or Area Chart by clicking on their icons (
 ) in the upper right corner.
 - See the overview of all the tickets created in your Organization. It can be a lot of data, so if you need to narrow it down, use Filters Panel (the left side of the app window). Here you can define data range using a few categories:
- ASSIGNED TO (when you want to check statistics of tickets assigned to chosen members of your Organization).
- OWNER (when you’re interested in statistics of tickets created by given colleagues).
- CLIENTS AND PROJECTS (to look at tickets assigned to particular clients and projects).
- STATUS (to filter out tickets accordingly to their progress).
- PRIORITY (when you need to compare tickets at the same priority level).
- TYPE (to analyze tickets execution due to their type eg. change request, bug, feature request).
- ESTIMATED TIME (to filter out tickets estimated similarly).
- UPDATE and CREATED (when you’re searching for tickets updated or created in given time period).
Now you know how to create visual tickets. To make better use of the app, invite your colleagues and start working together on projects.